Tips to prepare your wall for wallpaper removal
Removing wallpaper is not a project to undertake lightly, especially when it comes to older wallpapers and walls. Even if you’ve purchased the right removal tools and plan on doing the job yourself, there are still things you should know before starting.
Remove as much of the wallpaper as you can by hand
The first step to wallpaper removal is removing as much of the paper as you can by hand. This will help make the rest of the process faster and easier.
You can use a wallpaper scraper, a wallpaper knife, or both tools together (as well as any other tools that are available). To get started with either tool:
- Hold it at an angle and scrape lightly across the wall in one direction.
- Use short strokes so that you don’t tear through any remaining paper.
- Repeat this process until all visible traces of wallpaper have been removed from your walls
Soak the wall in hot water.
Soaking the wall will help soften any glue that is on your walls, allowing you to remove it easier from your walls. Using hot water will also help loosen any wallpaper glue left behind after removing it from your walls. You can soak a wall for about 20 minutes before starting to scrape off any remaining wallpaper glue and wrapping up your project. Make sure you get all of it off; otherwise, it can dry up and leave stains on your walls that are difficult to remove later on.
Remove any remaining backing using a scoring tool.
You can use a scoring tool to remove any remaining wallpaper. To do this, you’ll need to score the wallpaper with a sharp utility knife at an angle that is perpendicular to the wall. Don’t cut into the drywall or other materials when doing so.
Additionally, don’t use a serrated knife for this process; it won’t remove as much of the paper backing as you’d like and can make it harder to get clean cuts in the future.
Peel off the paper.
It’s time to see your wallpaper peel. Pop open a bottle of your preferred wallcovering remover or mix up a solution of 1 part water and 1 part ammonia in a spray bottle, then apply it to the wall with a sponge. Let it sit for 15 minutes before peeling away the paper layer by layer. Make sure to wear rubber gloves while removing wallpaper, as well as protective eyewear and a mask.
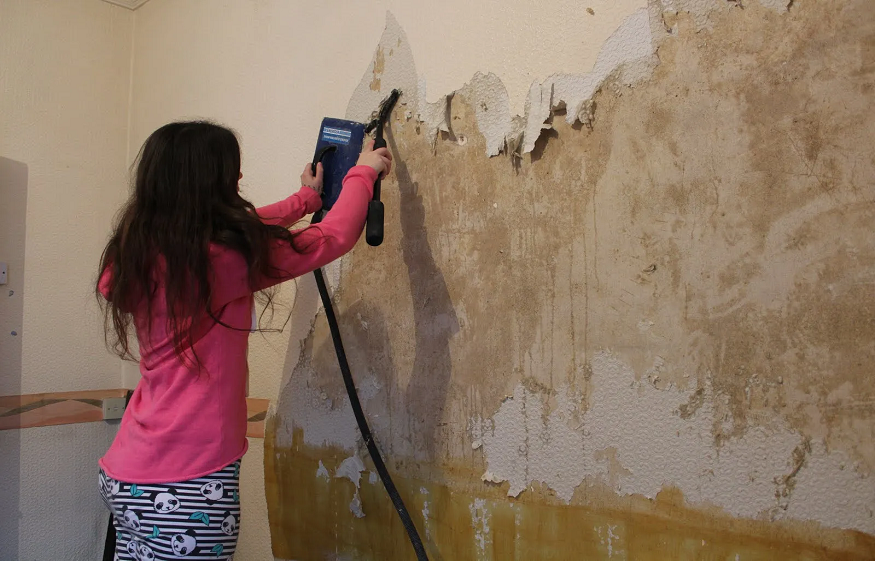
If you’re working with textured wallpaper, it can be difficult to remove. In case it is peeling away from the wall in large chunks, you may want to try using a heat gun or steamer on the backside of the paper .
Clean glue residue and then repair any holes or damage to the wall.
Prior to applying the adhesive remover, it is important to clean all glue residue and repair any holes or damage in your wall. You can use a paint scraper or putty knife to remove the wallpaper. Once you have removed all of the paper, you may need to fill in any holes and cracks with drywall compound (a mixture of sand, cement, and water).
Finally, if there are still areas where residual glue remains after using your adhesive remover solution—this should not be an issue if you are careful—clean them up with some more drywall compound before applying paint over them.
Conclusion
Removing wallpaper can be a tedious and time-consuming process, but it’s worth the effort. Not only will you have a clean and fresh look to your walls when you are done, but you will also be able to apply another type of wall covering if desired. We hope these tips help you prepare your wall for wallpaper removal.


